Showing posts with label Gluten Free. Show all posts

Saturday, March 29, 2014

No-Bake Energy Bites


So if there's a recipe I could call the "most requested" in our free fitness groups, this is definitely it.  In fact, this is the recipe that spurred us to create a food blog in the first place.  Trying to sift through months of facebook posts, folders of photos and recipes on the computer and in cookbooks every time someone asks for one of the recipes is much harder than you might think.  Aside from the initial fear of "Where is THAT recipe at?", we are actually very busy answering member questions, recording videos of modifications to the program exercises and chatting with other Beachbody coaches who need support and information for their own teams.  At the end of the day, we have papers and files and whatnot lying everywhere and aren't exactly the best at organization.  One day we will sit down and purge the computer of all the old information and daily challenges and logs.  One day we will toss the old notebooks, post it notes and scraps of paper full of reminders to do this and that.  One day we will!  And if we are going to have the energy to get it all done, we are going to need lots of these healthy, no-bake energy bites! 

There's a similar recipe floating around facebook, but we had a member, Jeff, who adapted the recipe.  Jeff's story is rather inspiring and unique.  If you think you can't become physically fit because of an impairment, I encourage you to join our support group and read his story sometime.  It's truly amazing and we're very fortunate to have him in the group.

These energy bites can be made all-natural by excluding the protein powder and upping the dry ingredients slightly. If you are sharing these with little ones it's a good idea to avoid protein powders containing BCAA's and creatine and stick to something more kid friendly.  Shakeology is a really great fit for this recipe if you are looking to give it a nutritional boost.  Because this recipe only uses one scoop we give the Shakeology a nod.  For a little more on our Shakeology "policy", click here

No Bake Energy Bites

1 Cup Old Fashioned Oatmeal
1/2 Cup Mini Chocolate Chips
1/2 Cup Milled Flaxseed
1 Scoop Protein Powder
1/2 Cup Creamy Peanut Butter (or nut butter of your choice)
1/3 Cup Honey
1 tsp. Vanilla Extract (or 1 Tbsp Mexican Vanilla Extract)
2-4 Tbsp. Almond Milk (regular Milk is OK also)

I love recipes I can just throw together.  This is all your ingredients, less the vanilla and milk.


First take all the dry ingredients and mix them in a bowl.  You can toss them with a fork, but I usually put on a rubber glove because the next step gets fun...


Now add the remaining ingredients and mix together until an even consistency is reached.


Once well blended, scoop the mixture into bite sized balls (I use a small ice cream/cookie dough scoop) and place onto a cookie sheet lined with parchment paper.  Refrigerate and eat.  The bites stay fresh outside of the fridge just fine, but cooling them a while will harden them a bit while the dry ingredients absorb the oils resulting in bites that keep their shape and are not too sticky to handle.

Here's how the bites rate made with budget protein powder.  The bites are decent to average with store bought types, but made without preservatives and they have better flavor and texture as well.  I also have specs for bites made with Chocolate Shakeology if you decided to try it.


Below I have the information on the bites made with Chocolate Shakeology instead of cheap powder.  You can clearly see a difference in the two.  Shakeology doesn't have the added sweeteners found in the inexpensive powder and it adds a good deal more vitamins and minerals to the mix.


Sunday, March 23, 2014

Healthy Homemade Chickpea Pizza Sauce


So not long after I posted the Cauliflower Pizza Crust, I decided to think outside the box to create a healthy pizza sauce.  Pizza sauce isn't all that bad on it's own really, but aside from the benefits of lycopene, there isn't much else going on.  I wanted to use ingredients my kids wouldn't normally eat and bury them in a delicious pizza sauce.  I considered sauteing onions, carrots, and basil to add to the mix, but instead opted for the selections below.  It gets to be a lot of work for a pizza if you decide to make the Cauliflower crust and the sauce, so I wanted to make it a bit easier to throw together.  The resulting sauce is thick and flavorful.  It doesn't tend to burn the roof of your mouth like a tomato sauce does and it brings out the flavor in your toppings.  Tested in an oven, but not on a wood fire or grill (yet...).

Healthy Homemade Chickpea Pizza Sauce

1 Can Chickpeas with Water
1 Can Tomato Sauce
1 Can Tomato Paste with Italian Seasonings
1 Tbsp. Dried Minced Onion or 1/4 C. Sauteed White or Yellow Onion
1 Clove Garlic
1 Tbsp. Italian Seasoning
3/4 C. Water
2 Tbsp. Olive Oil

Starting with the Chickpeas (the entire can, water and all) place all ingredients in a blender cup EXCEPT the 3/4 C. Water.  The Water we will use as needed to ensure smooth blending.  Blend slowly at first to get the ingredients moving well in the blender and then ramp up the speed, adding Water as needed to keep the mixture flowing in the cup.  Blend until smooth.  This can take a while depending on your blender.  The thing to remember is that a better blender will yield a thicker sauce while your average $20 blender is going to need more water and will produce a thinner sauce.  What is important here is that we get a smooth, well blended sauce.  Color will be like a vodka sauce (orange/milky pink) and the texture will be like a hummus or peanut butter.


Next, transfer the sauce to a saucepan and bring up to a high temp.  The thicker this sauce is, the less likely it will boil or even bubble.  Heat is going to break down the chickpeas just a bit more, creating a smoother texture.  If you needed to add more water to blend in the previous step, you can cook the sauce down a bit and achieve that hummus/peanut butter thickness I mentioned.


Once the sauce is heated you can use it immediately.  It will be thick, but it will spread very easily because it still has a high moisture content.  Spread the desired amount (about 1/3 Cup) on a pizza crust.  Need a good recipe for one?  Try the Cauliflower Pizza Crust we featured last month.  For this experiment, I just used the cheapies from WalMart so I could toss it and start over if needed.  While I was there I found some turkey pepperoni and thought I'd give that a try.  Gotta say it was really good.  The crust tasted like cardboard, but the sauce was quite good.  This is a work in progress and if you have any suggestions/alterations, just make a comment below and we will see what we can do to dial this in a bit further.


Nutritionally this is much better than your canned pizza sauce and the kids might not even know the difference.  Our daughter is one to turn her nose up at anything new and she caught me making this so I was met with some resistance, but she ate the entire slice and other than a few grumblings about not liking it before she had even tried it, she was quiet.  We will see if she wants to have it again tomorrow night.  After all this makes just under a quart of sauce, which is enough for a good number of pizzas.  I will freeze the extra in roughly one cup quantities so I can quickly thaw and top a pizza or two at a time.

Enjoy!

Sunday, February 2, 2014

Gluten Free Blender Pancakes


Aahhhh...  The smell of a stack of hot pancakes on a Sunday morning is so inviting.  When Krys and I first married I was always working and I rarely if ever was able to enjoy a good breakfast.  It was always up out of bed at 3AM, grab a breakfast hot dog at the gas station, rush to work and drink a pot of coffee waiting for lunch.  After a few years of that nonsense I tired on occasion to make pancakes on the mornings I was able to spend at home.  First I'd crack open a box of mix that only I seemed to like.  Then I'd make a horrible mess of the kitchen mixing the ingredients.  Finally I would cook the pancakes and serve them to my beautiful wife who at this point was fuming at me because I burned them (again).  I soon learned that you could buy premade frozen pancakes at the grocery store in a big sack, so we did that for a while, but I never felt satisfied by them.  I was starting to feel as if I would never enjoy a delicious stack of pancakes ever again...  And then I found this recipe.

Nothing says hearty like these quick and easy pancakes we now make on weekend mornings.  The kids love them and I really like that they aren't made from a box.  There are only a few ingredients and you are able to tweak the recipe in many ways.  This is a pretty well known recipe in the blogosphere, but it's a good fit for the group and I wanted to share it here for everyone.  After all, it just might have saved my marriage...

As for the ingredients, there isn't anything called for that you need to make a special trip to the store to find.  Rolled Oats, Milk (or a milk alternative), an Egg, a Banana, Honey, Cinnamon, Vanilla, Salt and Baking Powder are all you need.  Usually these items are readily stocked in the Gilsrud pantry.  The banana can be ripe or just ready to eat.  No green ones, however.  We want the proteins loose so we can effectively replace wheat flour and the flavor will range from a banana cake to a banana bread flavor depending on the ripeness.  We prefer a more yellow banana for this.

Gluten-Free Blender Pancakes

2 Cups Rolled Oats
1/4 tsp. Salt (optional)
1 Large or 1-1/2 Medium Bananas
1/2 - 1 tsp. Ground Cinnamon
1-1/2 tsp. Baking Powder
1 or 2 Large Eggs
1-1/4 Cups Milk (or alternative)
2 Tablespoons Honey
1 tsp. Vanilla Extract

Your choice of Topping or Syrup

If you want to sit down and eat as a family, heat your oven to 200°F and place a serving plate (that ISN'T plastic) on the top rack.  You can stack the cakes on this plate to keep them warm until you're ready to serve.


As for our mixing directions, All of it goes in the blender.  If you have a low-end blender, I suggest you put the liquid ingredients on the bottom and dry on top.  I have a Blendtec and I highly recommend you invest in one as well.  I will be posting more recipes for blender soups and the like eventually and this blender makes so many things a breeze.  For years I had a Bosch, which was great, but small and didn't do nearly as good a job as the Blendtec.  A Vitamix is a great blender as well.  A buddy of mine owns one and we pick on each other about blender choice, but they're both quite nice.  That said, with a Blendtec or Vitamix you'll want to put the dry ingredients in first and liquid on top as pictured below.  Blend on slow speed until mixed and then ramp up the speed until a well blended batter forms.  On my blender I just use the batters button and it does it all for me.


Now heat a griddle to 350°F.  The griddle is hot enough when you drop beads of water on the griddle and they dance around.  Lightly oil the griddle with some coconut oil.  I do this by greasing a paper towel and rubbing it on the griddle surface.


Pour batter onto the griddle surface in 1/3 cup portions.  I eyeball it, pouring about 5" round cakes that settle to 6" overall.  When they start to look dry you should flip them and cook for just a little more than a minute on the other side.  You can pour large pancakes if you'd like and they will hold together when you flip them, so don't worry.  Transfer the pancakes to the heated plate in the oven until ready to serve. 


And here's how they stack up!  Pun intended, by the way...


Wednesday, January 29, 2014

Cauliflower Pizza Crust


So, earlier tonight Krys posted a pic of the cauliflower crust pizza we learned of through Facebook a while back and she had quite a few requests to post a recipe.  Here goes! 

This recipe is not the one we saw on Facebook.  We hadn't heard of this use for cauliflower until just a short time ago and we didn't catch the link because I have tried preparing cauliflower in the past and found that the kids really didn't care for it much.  Krystal did well with my roasted cauliflower, but I could tell it really wasn't her cup of tea.  This seemed like this pizza could end up as a dinner disaster, but it was very well received. The thing about this crust is that the flavor is much like a breadstick.  So much like a breadstick that I may bake these up to use for dipping in lieu of bread at out next Italian meal.  I found this recipe on the lucky penny blog and there is a dairy free recipe also that we haven't tried.

Soon I will add a recipe for my pizza sauce, so keep your ear to the ground!

As for the toppings, we are a pretty basic Canadian bacon family, but you can use any toppings you like on this crust to make it your own.  The nutritional breakdown will be for the crust itself and you can use your own calorie counter to calculate the pizza with your choice of topping.

Cauliflower Pizza Crust

2 to 3 cups processed Cauliflower (refer to recipe)
1/4 tsp. Salt
1/2 tsp. Dried Basil
1/2 tsp. Dried Oregano
1/2 tsp Garlic Powder
1/4 cup Shredded Parmesan Cheese
1/4 cup Mozzarella Cheese
1 Egg
1 Egg White

Preheat your pizza stone or baking sheet in oven at 450°.  Set aside a lightly oiled piece of parchment paper that is the same size as the stone/sheet you are using.

Take a second to crush the spices into a fine powder for a more even distribution when we get to that step. 


After thoroughly washing and drying a head of cauliflower, remove the florets from the stem and pulse in a food processor (hopefully one that's larger than ours!) until the cauliflower resembles fluffy snow.  Cover the processed cauliflower in a microwave safe bowl and microwave on high about 4 minutes (longer for microwaves less than 1000w) to gently steam the cauliflower.  Dump the hot cauliflower onto a kitchen towel and wait until the cauliflower is cool enough to handle comfortably before wrapping the cauliflower in the towel tightly and wringing out all loose liquid. The more liquid you are able to remove the less crumbly the resulting crust will be.


Dump the ringed out cauliflower into a bowl.  Gradually incorporate the cheeses, salt, basil, oregano, and garlic powder with the cauliflower, stirring with a fork.  Next add the egg and egg white and mix thoroughly with hands to form a "dough" ball.  The dough should be sticky, but able to be formed into a smooth ball.


Flatten the dough ball on the lightly oiled parchment paper into a round or square crust.  If you're feeling fancy, you can give it a really irregular "artisan" looking shape.  Our experience is that the pizza will cook quite a bit more evenly than a wheat crust so go wild and make the pizza crust any shape you feel like.  Do remember that the toppings may cook unevenly depending on what you choose.


Transfer the parchment paper to the hot stone or baking sheet and proceed to bake the crust for 8-12 minutes, until the crust is evenly cooked and golden brown.  Remove the crust from the oven and top with your favorite meats and cheeses.  Leave the stone in the oven if you are able to slide the parchment paper onto another sheet or cutting board.  Return the crust to the oven once topped and bake on the stone/sheet for approximately 7 minutes to melt the cheese and heat the toppings.  If you are concerned the crust is going to burn but the toppings are not yet cooked, fire up the broiler and finish it off.  The parchment should be safe under the broiler (different brands have different ratings), but you will need to watch carefully so you do not start a fire.


Here's what we ended up with!  It was delicious and best of all, it was not heavy like most pizzas tend to be.  The flavor of the crust was much like a seasoned bread crust and the texture was amazing!  Letting the pizza cool slightly before eating helped the crust hold together without crumbling, but the crust is a bit flimsier than a wheat crust.  Let us know what you think of this recipe in the comments section below!

Here are the Nutritional Facts on the crust as per the recipe:


Now, before you pick this recipe apart just take a trip to the grocery store and find a pizza that can compare to this.  There isn't another pizza I've seen that is going to provide 4 grams of protein per slice in the crust alone, and the naturally-sourced vitamins and minerals are plentiful.  It's a great way to get your whole family to finally eat some cauliflower.  Your kids will love this pizza crust and adults can certainly appreciate the rich flavor.  Unlike most other pizzas, this cauliflower crust satisfies your hunger and sticks with you, so you aren't going to find yourself snacking all night.

I have two suggestions if you want to tweak the recipe.  First, the original recipe also calls for almond meal if you are short on cauliflower (1 Tbsp. for a 1 cup cauliflower deficit???).  The quantity seemed incorrect, so I left it out.  You could add 2-3 Tbsp. safely, but I worry that it will make the resulting crust crumbly.  Unless you have almond meal handy I would leave it out.  You can also trim 131mg sodium per serving from the recipe by omitting the salt.  Given that the cheeses and toppings will likely add a bit of sodium and the crust is already very flavorful, I doubt you'll even notice that it isn't in there.

Enjoy and leave your comments below!  Please feel free to share this recipe with your friends and family!

Sunday, January 26, 2014

Gluten Free Peanut Butter Kisses


Who says we can't start this thing off with a little treat?  Tonight we made Ski Soup and these Gluten Free Peanut Butter Kisses for a little dessert.  The kids love these and I don't feel guilty giving them one because there are just a few natural ingredients that are needed.  Remember, these are a treat and should be treated as such.  The big difference between these cookies and other peanut butter cookies is the lack of flour.  The cookies are free of gluten, have twice the protein, 1/3 less sodium, and roughly 1/4 fewer calories versus our old standby.  These also come together quickly and bake in just 10 minutes, so we can throw together a batch while making dinner.  You can use the original natural peanut butters that have oil that separates out or you can use the type that doesn't need stirring.  Either will work fine.
 
Gluten Free Peanut Butter Kisses
 
1 Cup Creamy Natural Peanut Butter
1/2 Cup Light Brown Sugar
1 Egg
1/2 tsp. Vanilla Extract
5 tsp. White or Natural Sugar
24 Hershey Kisses, unwrapped
 
Preheat oven to 350 degrees. 


In a mixing bowl, combine all ingredients except white sugar and Hershey Kisses and mix at medium-high speed until the resulting batter has a crumbly, somewhat grainy appearance.  The mixture should not appear greasy and smooth. 
 
 
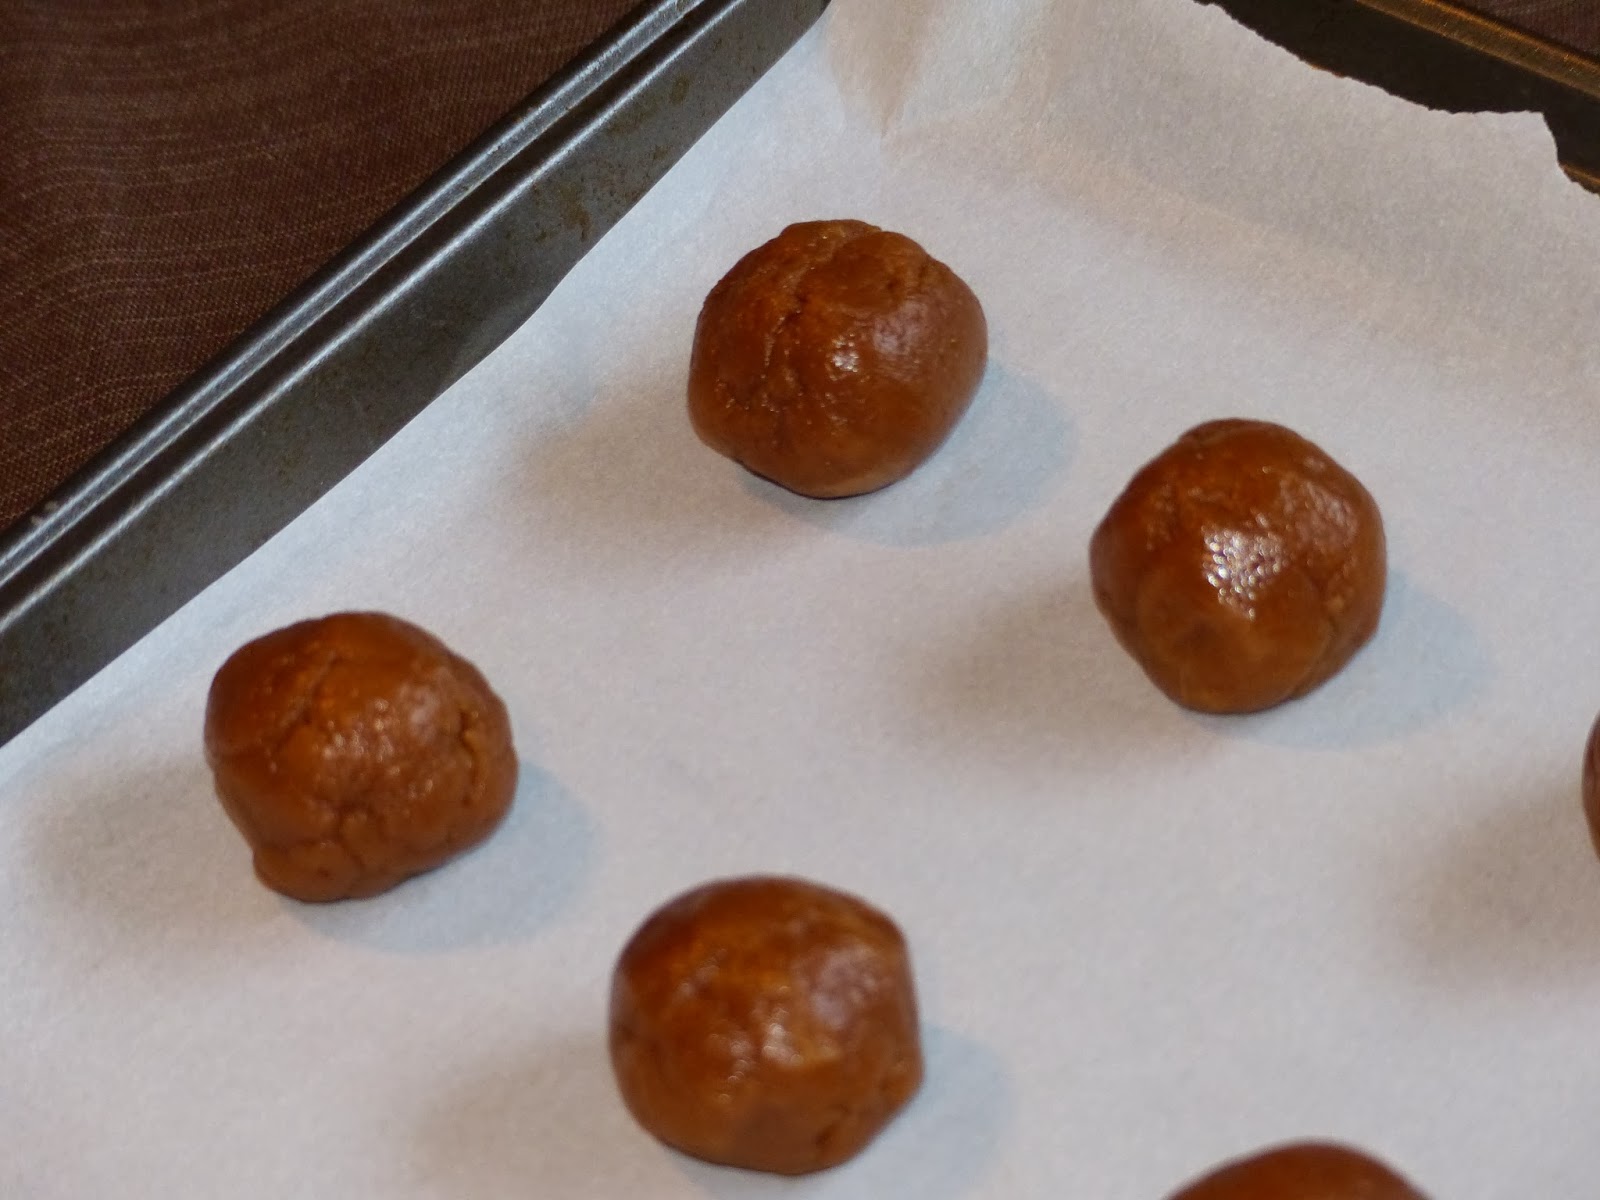
Once mixed thoroughly, form the "dough" into 24 balls, approximately 1-1/2 Tablespoons each.  Lightly press one side of each ball into a bowl containing the white sugar.  Then place each sugared dough ball onto a cookie sheet lined with parchment paper.  Space the cookies 2" apart, filling the sheet evenly.


Bake the cookies for 10 minutes at 350 degrees.  The cookies will have held their shape for the most part and will also appear undercooked.  Press one kiss into the top of each cookie immediately (or to make a more traditional peanut butter cookie without the kiss, just flatten slightly with a fork).  Then transfer the cookies to a cooling rack and repeat with the next batch. 
 
 
The cookies keep for a week or so in a sealed container and may also be frozen.  If you're single or if you do not trust yourself with a plate of cookies this delicious in the house, you can share them with friends, or as mentioned, freeze them, taking out only one or two to thaw at a time.